
Welcome back for Part 9 of this System Center VMM series, in this post I will talk to you about how to tag drivers that we will use when we deploy a physical host with VMM.
The drivers we need are generally the following
- Chipset Drivers
- Storage Controller drivers for OS and Storage. It can be Raid or HBA drivers.
- Network Drivers
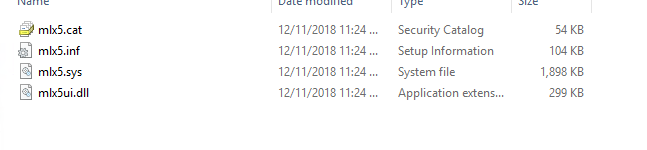
Download these from your Hardware Vendor. Extract the drivers and copy over the needed files. Those files are .cat .inf .sys .dll files.
Here is an example of Mellanox files that is needed.
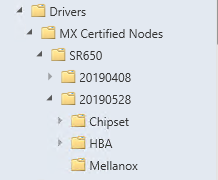
Create a structure on your VMM Library server and copy the files over.

Refresh your library server and they will show up under the library server in VMM.
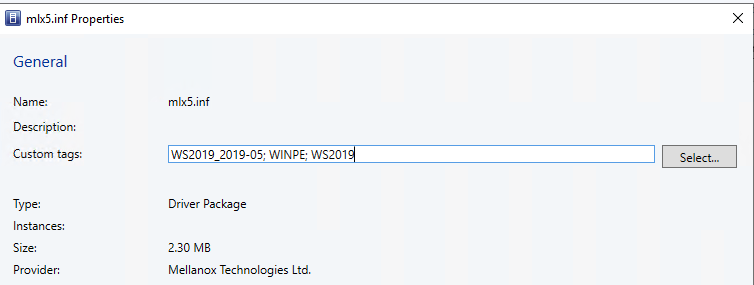
Now to tag a Driver you can do it 2 ways, manually by opening the properties dialog on the .inf file and write in the tags you want.
Type in the tags you need in the Custom Tags Window. I recomend to
set both WINPE and a tag representing the OS to be deployed and month the files are from.
Now the 2nd way is to script it with powershell to scroll trough the folders where the drivers are located. You can use a combination of Get-SCDriverPackage and Set-SCDriverPackage
Once that is done we need to add the WINPE to the image. To do this we need to use powershell with Publish-SCWindowsPE . But first we need to add the drivers to the image. You can do that with a simple script. I borrowed this one from Thomas Maurer
$mountdir = \"c:\\mount\"
$winpeimage = \"c:\\temp\\boot.wim\"
$winpeimagetemp = $winpeimage + \".tmp\"
$path = \"C:\\Drivers\"

mkdir \"c:\\mount\"
copy $winpeimage $winpeimagetemp
dism /mount-wim /wimfile:$winpeimagetemp /index:1 /mountdir:$mountdir

dism /image:$mountdir /add-driver /driver:$path

Dism /Unmount-Wim /MountDir:$mountdir /Commit
publish-scwindowspe -path $winpeimagetemp
del $winpeimagetemp
You can also combine this with Get-SCDriverPackage to go trough the drivers that has a tag with WINPE. And then insert that into with a for each for instance.
Stay tuned for the next post, where i will write about Physical Computer Profiles
How to configure System Center VMM Part 1 – Basic Design
How to configure System Center VMM Part 2 – Host Groups
How to configure System Center VMM Part 3 – Logical Network
How to configure System Center VMM Part 4 – Port Profiles
How to configure System Center VMM Part 5 – Logical Switches
How to configure System Center VMM Part 6 – Library Server
How to configure System Center VMM Part 7 – Run As Accounts
How to configure System Center VMM Part 8 – Deployment Server
How to configure System Center VMM Part 9 – Driver Tagging
How to configure System Center VMM Part 10 – Physical Computer Profiles
How to configure System Center VMM Part 11 – Bare Metal Deployment
How to configure System Center VMM Part 12 – Update Server and Baselines
How to configure System Center VMM Part 13 – Patching Hosts
How to configure System Center VMM Part 14 – Hardware Profiles
How to configure System Center VMM Part 15 – Guest OS Profiles
How to configure System Center VMM Part 16 – VM Templates
How to configure System Center VMM Part 17 – Clouds